Deepomatic Platform
  • Overview
  • Release notes
    • January 2025
    • November 21, 2024
    • October 17, 2024
    • September 19, 2024
    • July 18, 2024
    • June 27, 2024
    • May 23, 2024
    • April 18, 2024
    • March 21, 2024
    • February 22, 2024
    • January 18, 2024
    • December 13, 2023
    • October 26, 2023
    • July 20, 2023
    • June 29, 2023
    • May 29, 2023
    • April 27, 2023
    • March 30, 2023
    • February 17, 2023
    • January 19, 2023
    • December 22, 2022
    • November 18, 2022
    • October 19, 2022
    • September 19, 2022
    • July 27, 2022
    • June 26, 2022
    • May 17, 2022
    • April 13, 2022
    • March 17, 2022
    • February 10, 2022
    • December 21, 2021
    • October 26, 2021
  • Getting started
  • ADMIN & USER MANAGEMENT
    • Invite and manage users
      • Invite group of users at once
      • SSO
        • Azure Active Directory
  • Deepomatic Engage
    • Integrate applications
      • Deepomatic vocabulary
      • Deepomatic connectors
        • Set-up
        • Camera Connector
        • Work Order Connector
      • API integration
        • Authentication
        • Errors
        • API reference
          • Work order management
          • Analysis
            • Guide field workers
            • Perform an analysis
            • Correct an analysis
          • Data retrieval
          • Endpoints' list
      • Batch processing
        • Format
        • Naming conventions
        • Processing
        • Batch status & errors
      • Data export
    • Use the mobile application
      • Configure a mobile application
      • Create & visualize work orders
      • Complete work orders
      • Offline experience
    • Manage your business operations with customisable solutions
      • Roles
      • Alerting
      • Field services
        • Reviewing work orders
        • Exploring work orders
        • Grouping work orders
        • Monitoring assets performance
      • Insights
  • Security
    • Security
    • Data Protection
Powered by GitBook
On this page
  • Single Annotation
  • Fast Annotation

Was this helpful?

  1. Deepomatic Drive
  2. Adding and managing data
  3. Annotating Images

Classification and Tagging

Was this helpful?

Single Annotation

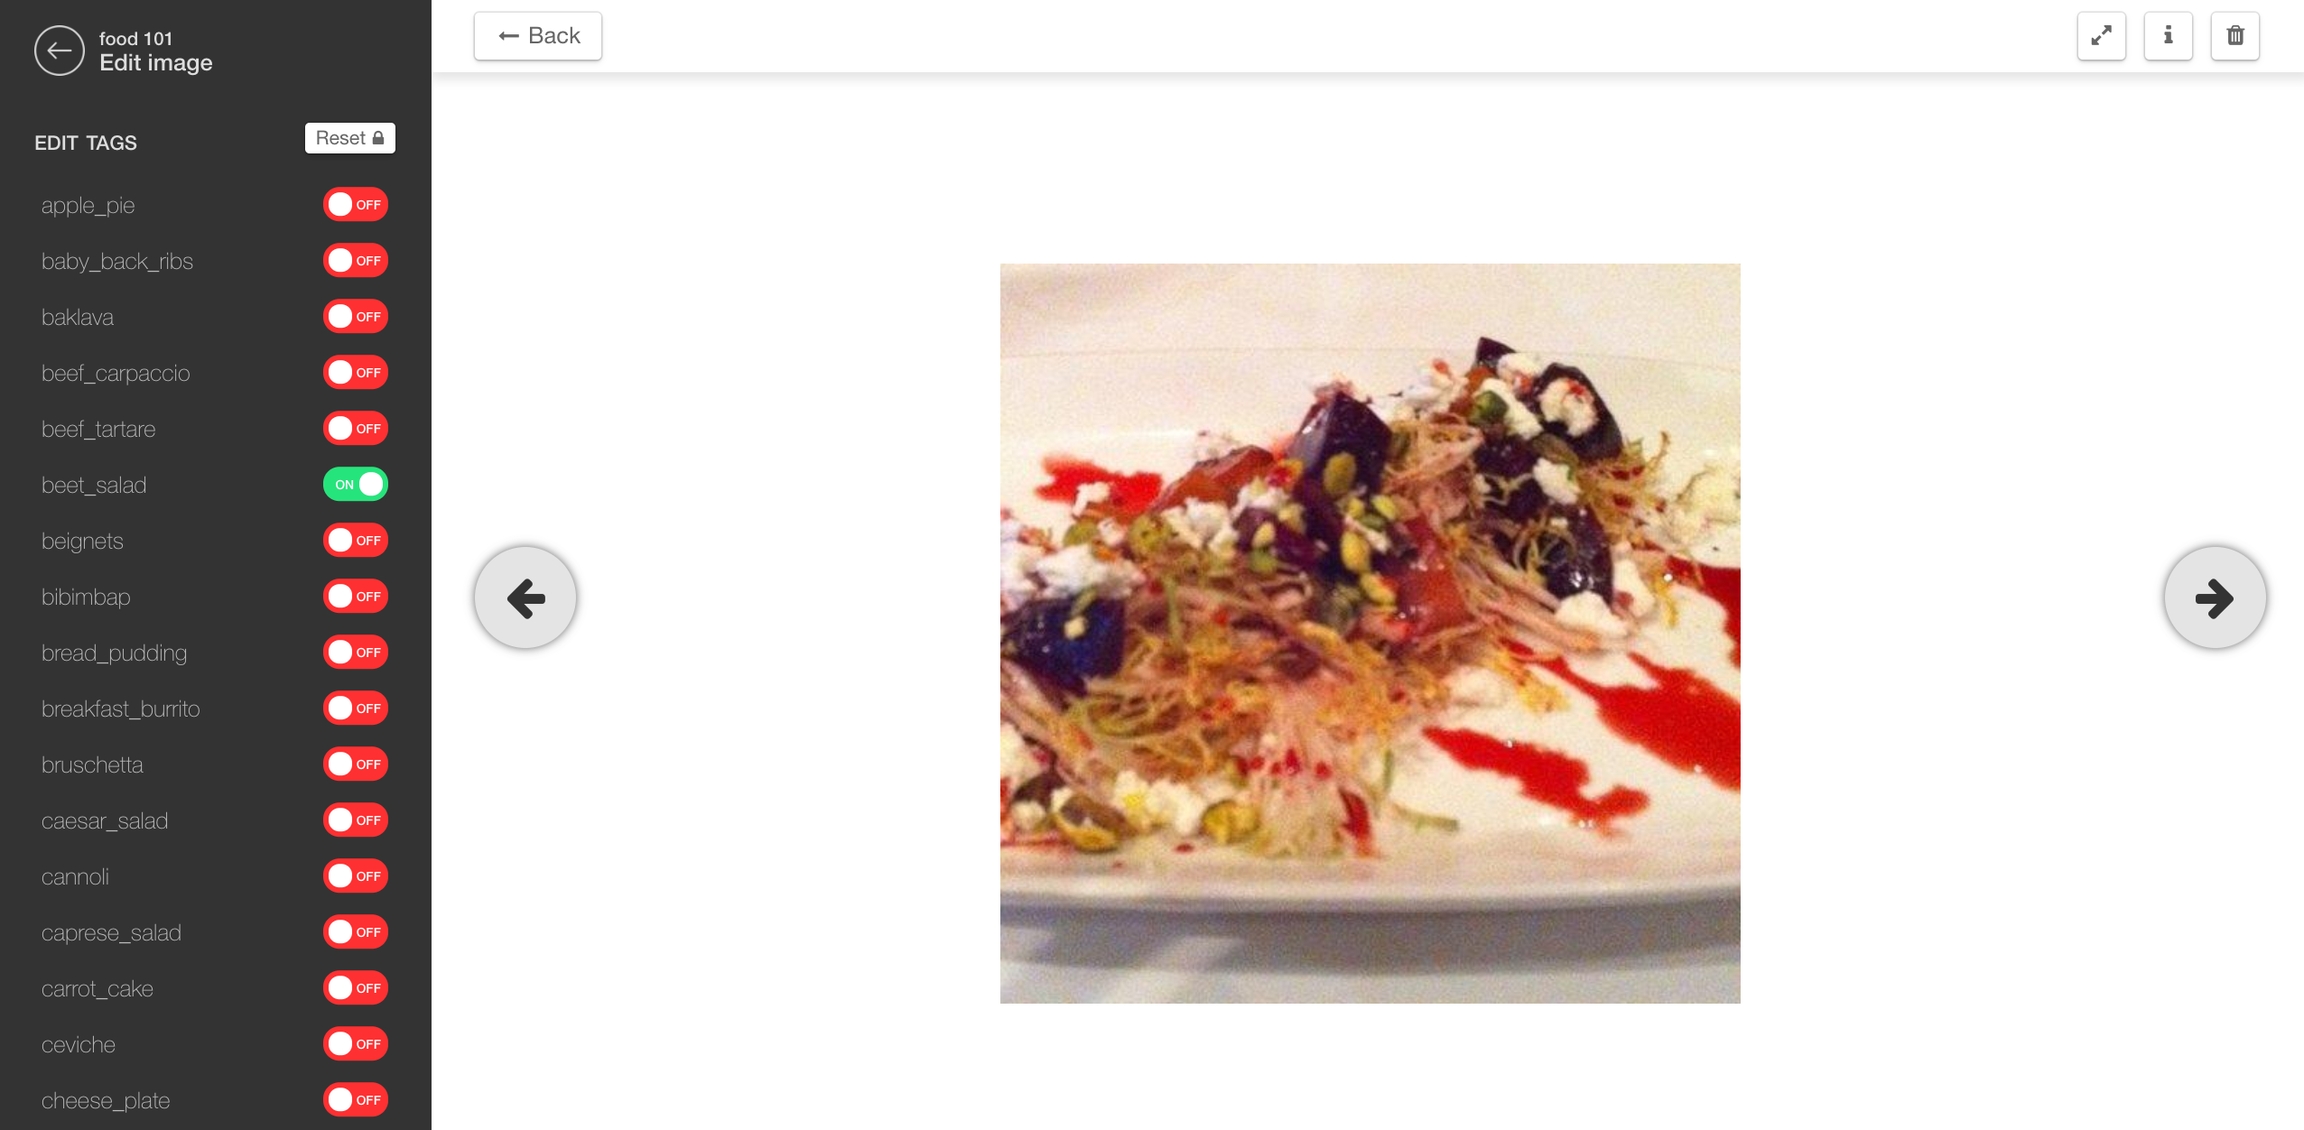
When you are on an Image page, the navigation bar on the left displays all the concepts attached to the project. Every toggle turned to green means the corresponding concept is associated with the image.

By playing with the toggles, you can then edit the annotations attached to an image:

It is not possible to partially annotate an image by only specifying a subset of all concepts. All concepts must be either turned to green or red to create a valid annotation.

You can navigate to the next or previous images by using the left and right arrows of your keyboard, or by clicking on the left and right arrow buttons.

Fast Annotation

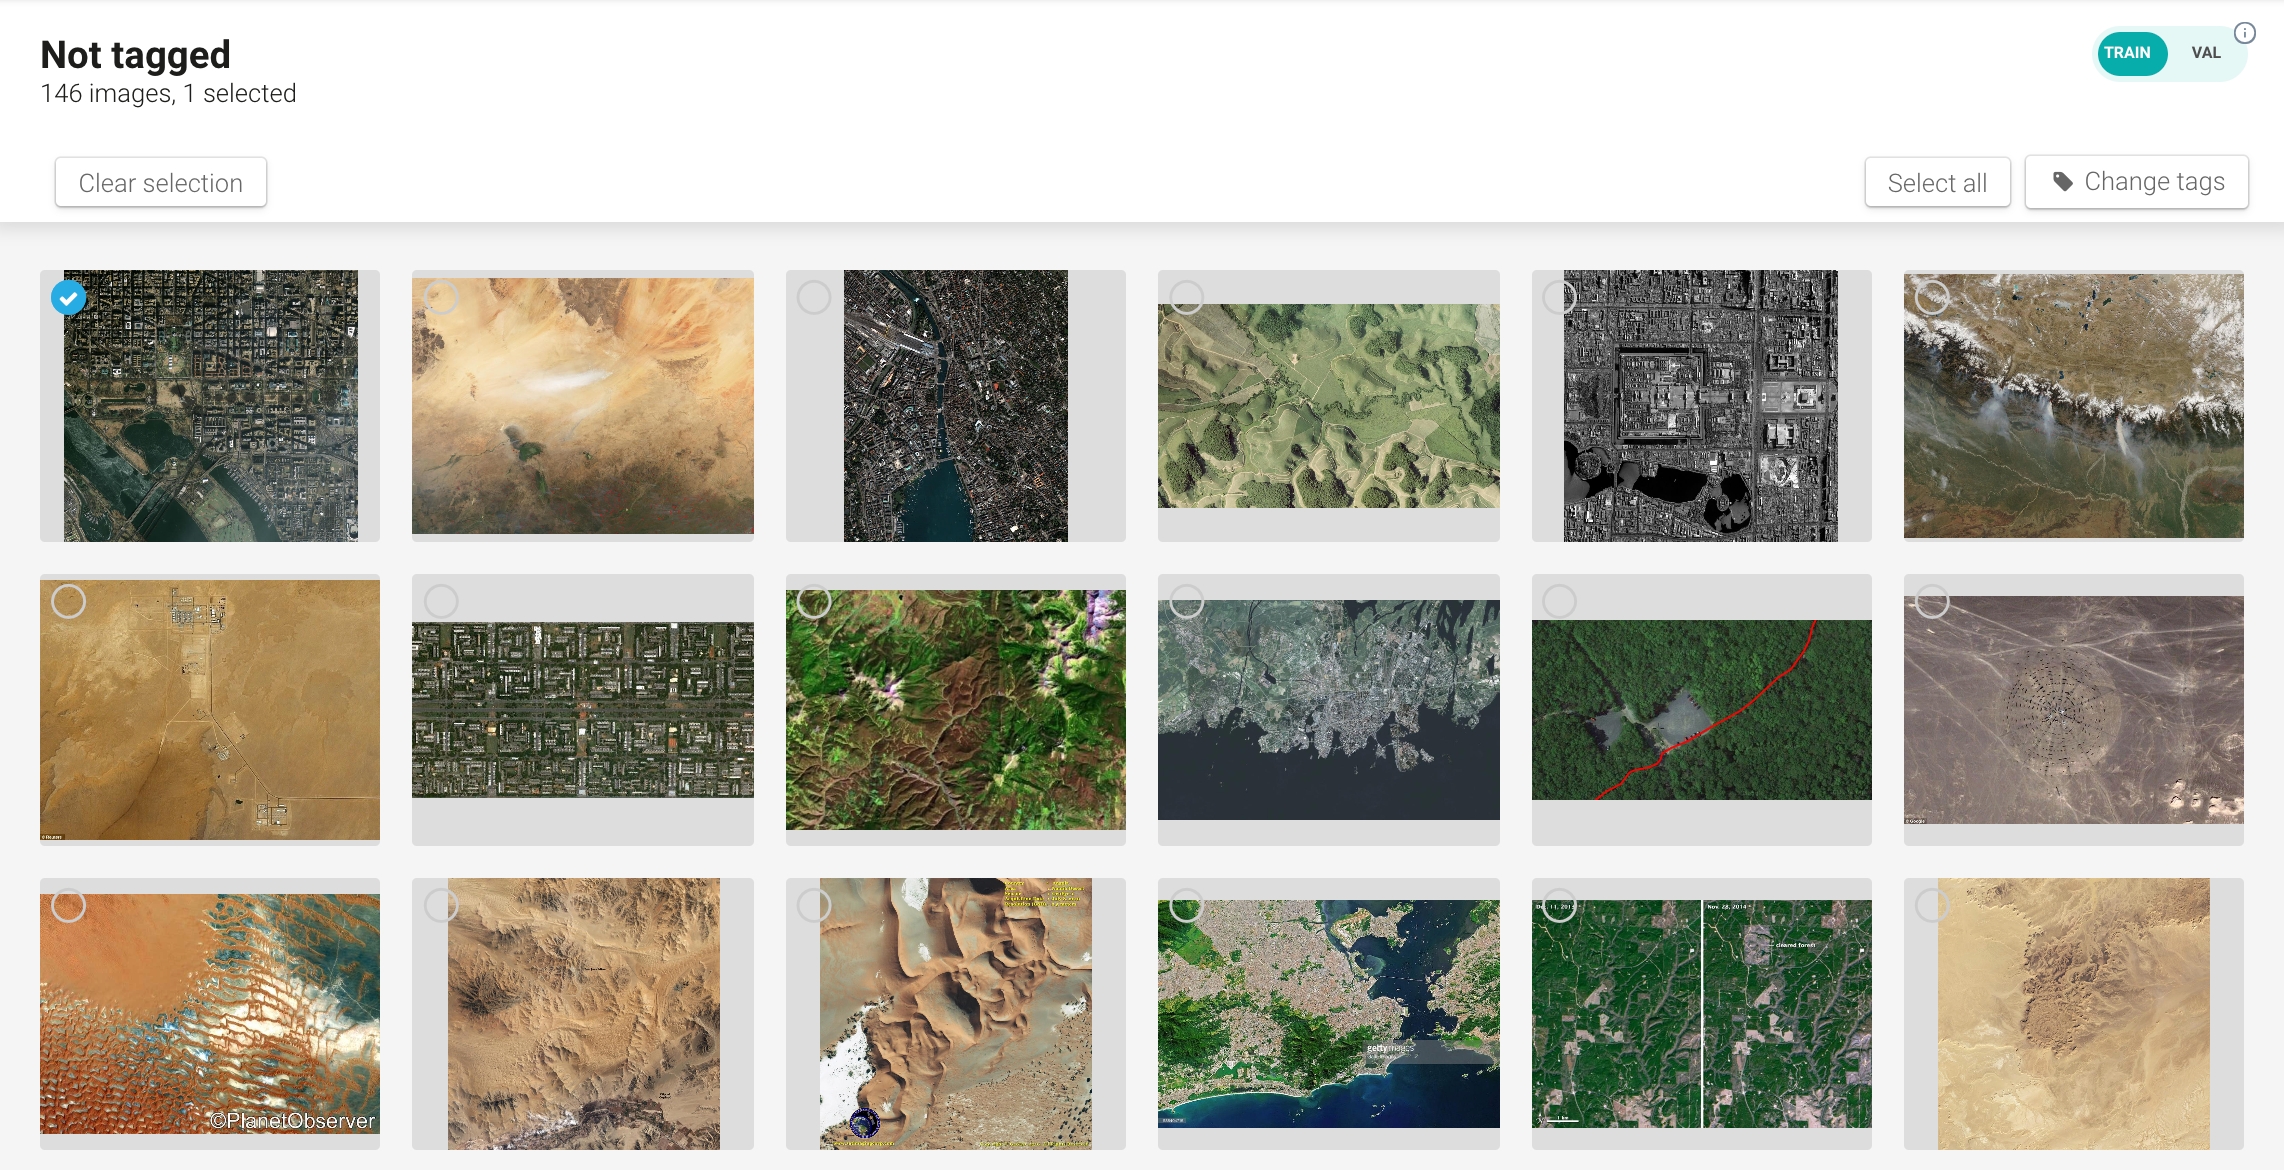
To take advantage of the gallery pages, you can also make a selection and apply an annotation to all the images that you have previously selected. Here is how you can do that:

  • Go to a gallery page

  • Start a selection by hovering on an image and clicking on the small grey icon on the top left corner of the image

  • You can add as many images as you want to your selection by simply clicking on those images.

Using the Shift key of your keyboard, you can select a range of images by only selecting the first and last images of your selection.

  • Once images are selected, you can click on Change tags, create or modify the annotation and then click on Apply. This will apply the same annotation to all images in your selection and the page will reload. It is likely that some images disappear from the gallery: this is normal and simply means that you have turned the toggle of the current concept to red.